How To Create Spring Boot Project using Spring Starter Kit
Let us learn to create a Spring Boot project from scratch using two approaches, and let us add a greeting message that shows up on the webpage https://127.0.0.1:8080
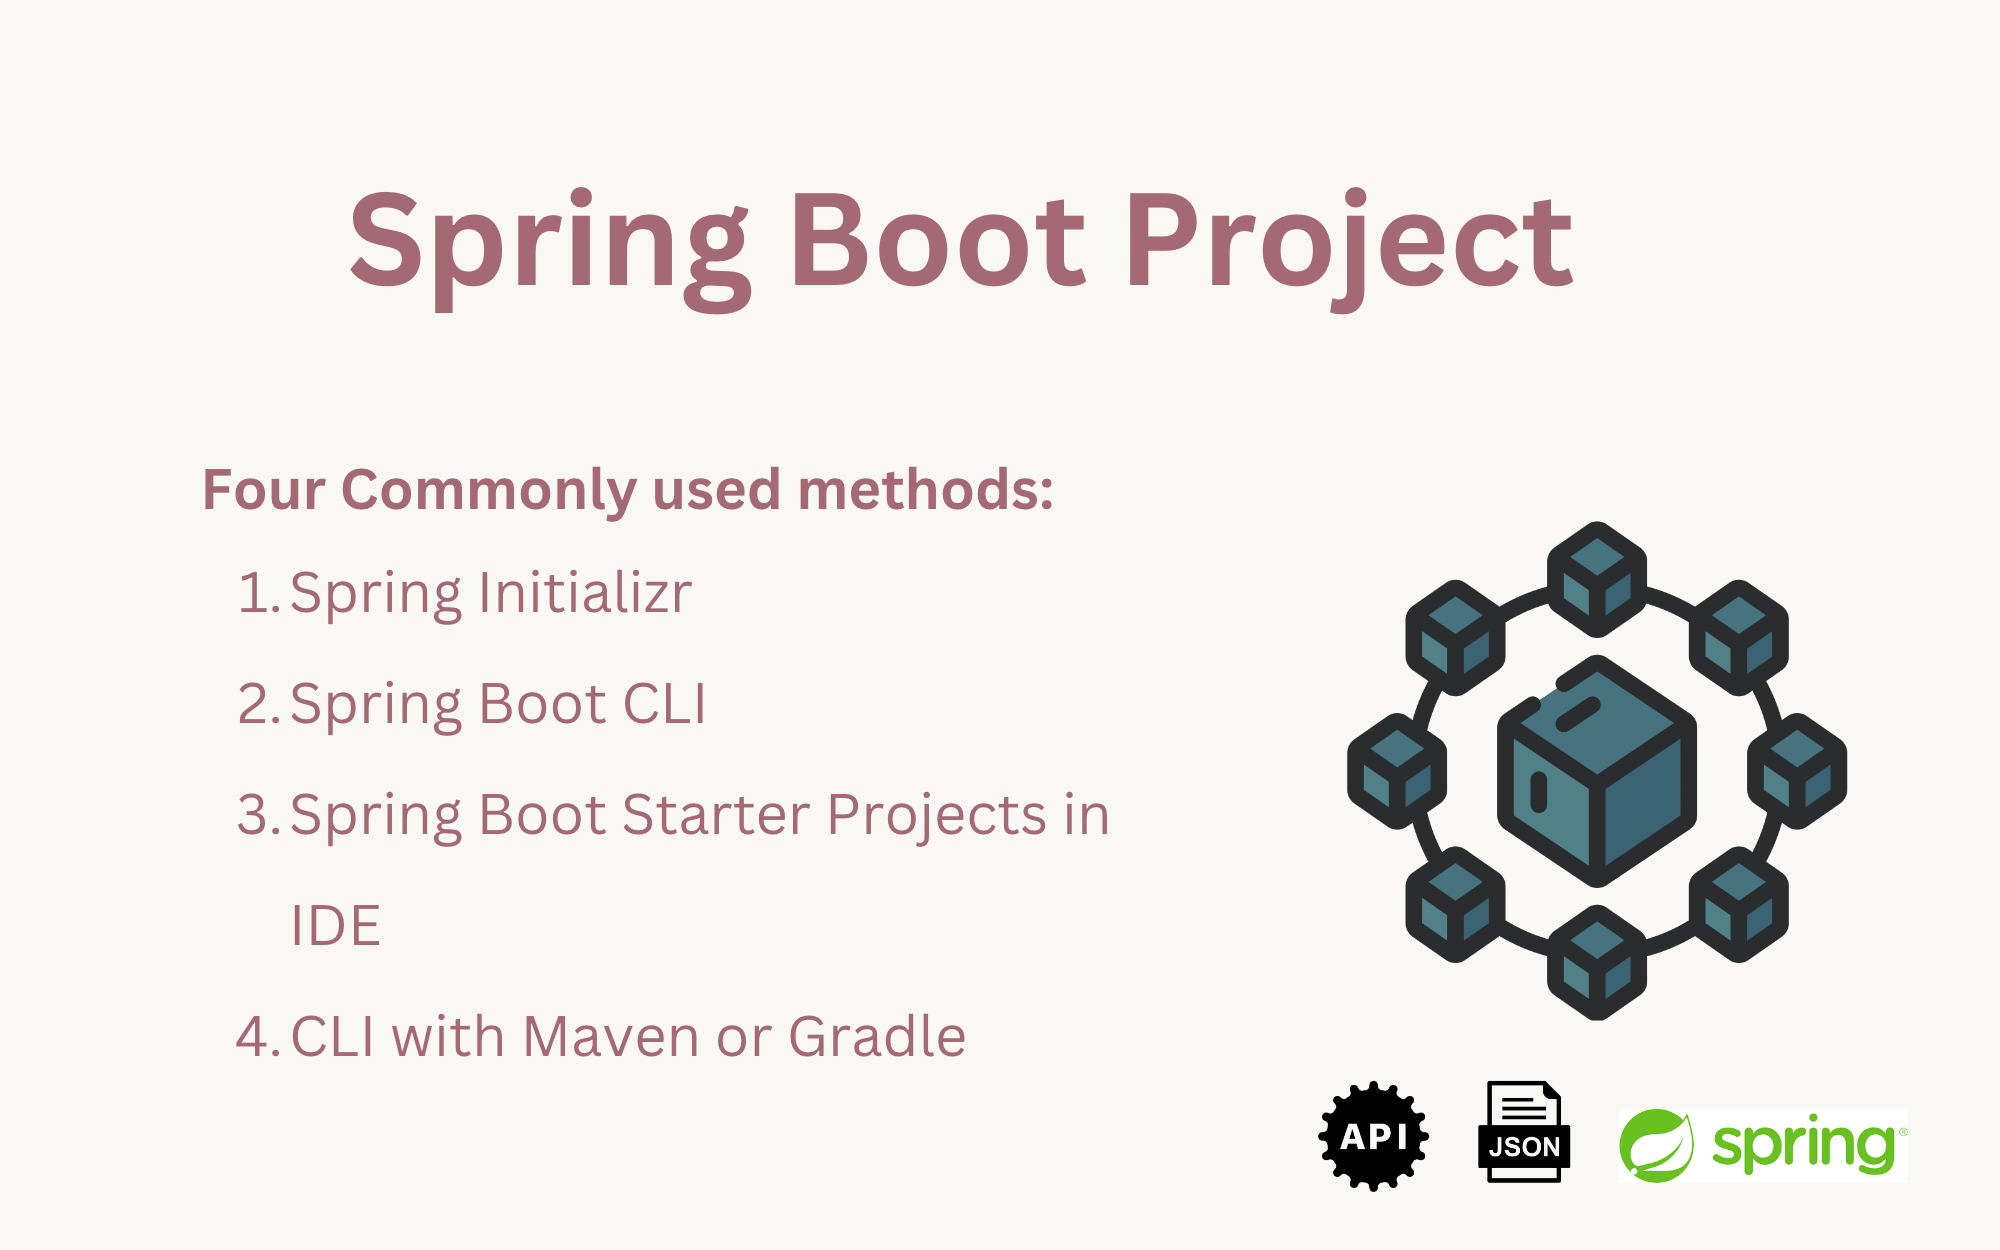
Table of Contents
Ways to create spring-boot project
There are several methods to create a Spring Boot project. We can bootstrap the Spring Boot application with one of the four methods available.
- Spring Initializr
- Spring Boot Starter Projects in IDE
- Spring Boot CLI
- CLI with Maven/Gradle
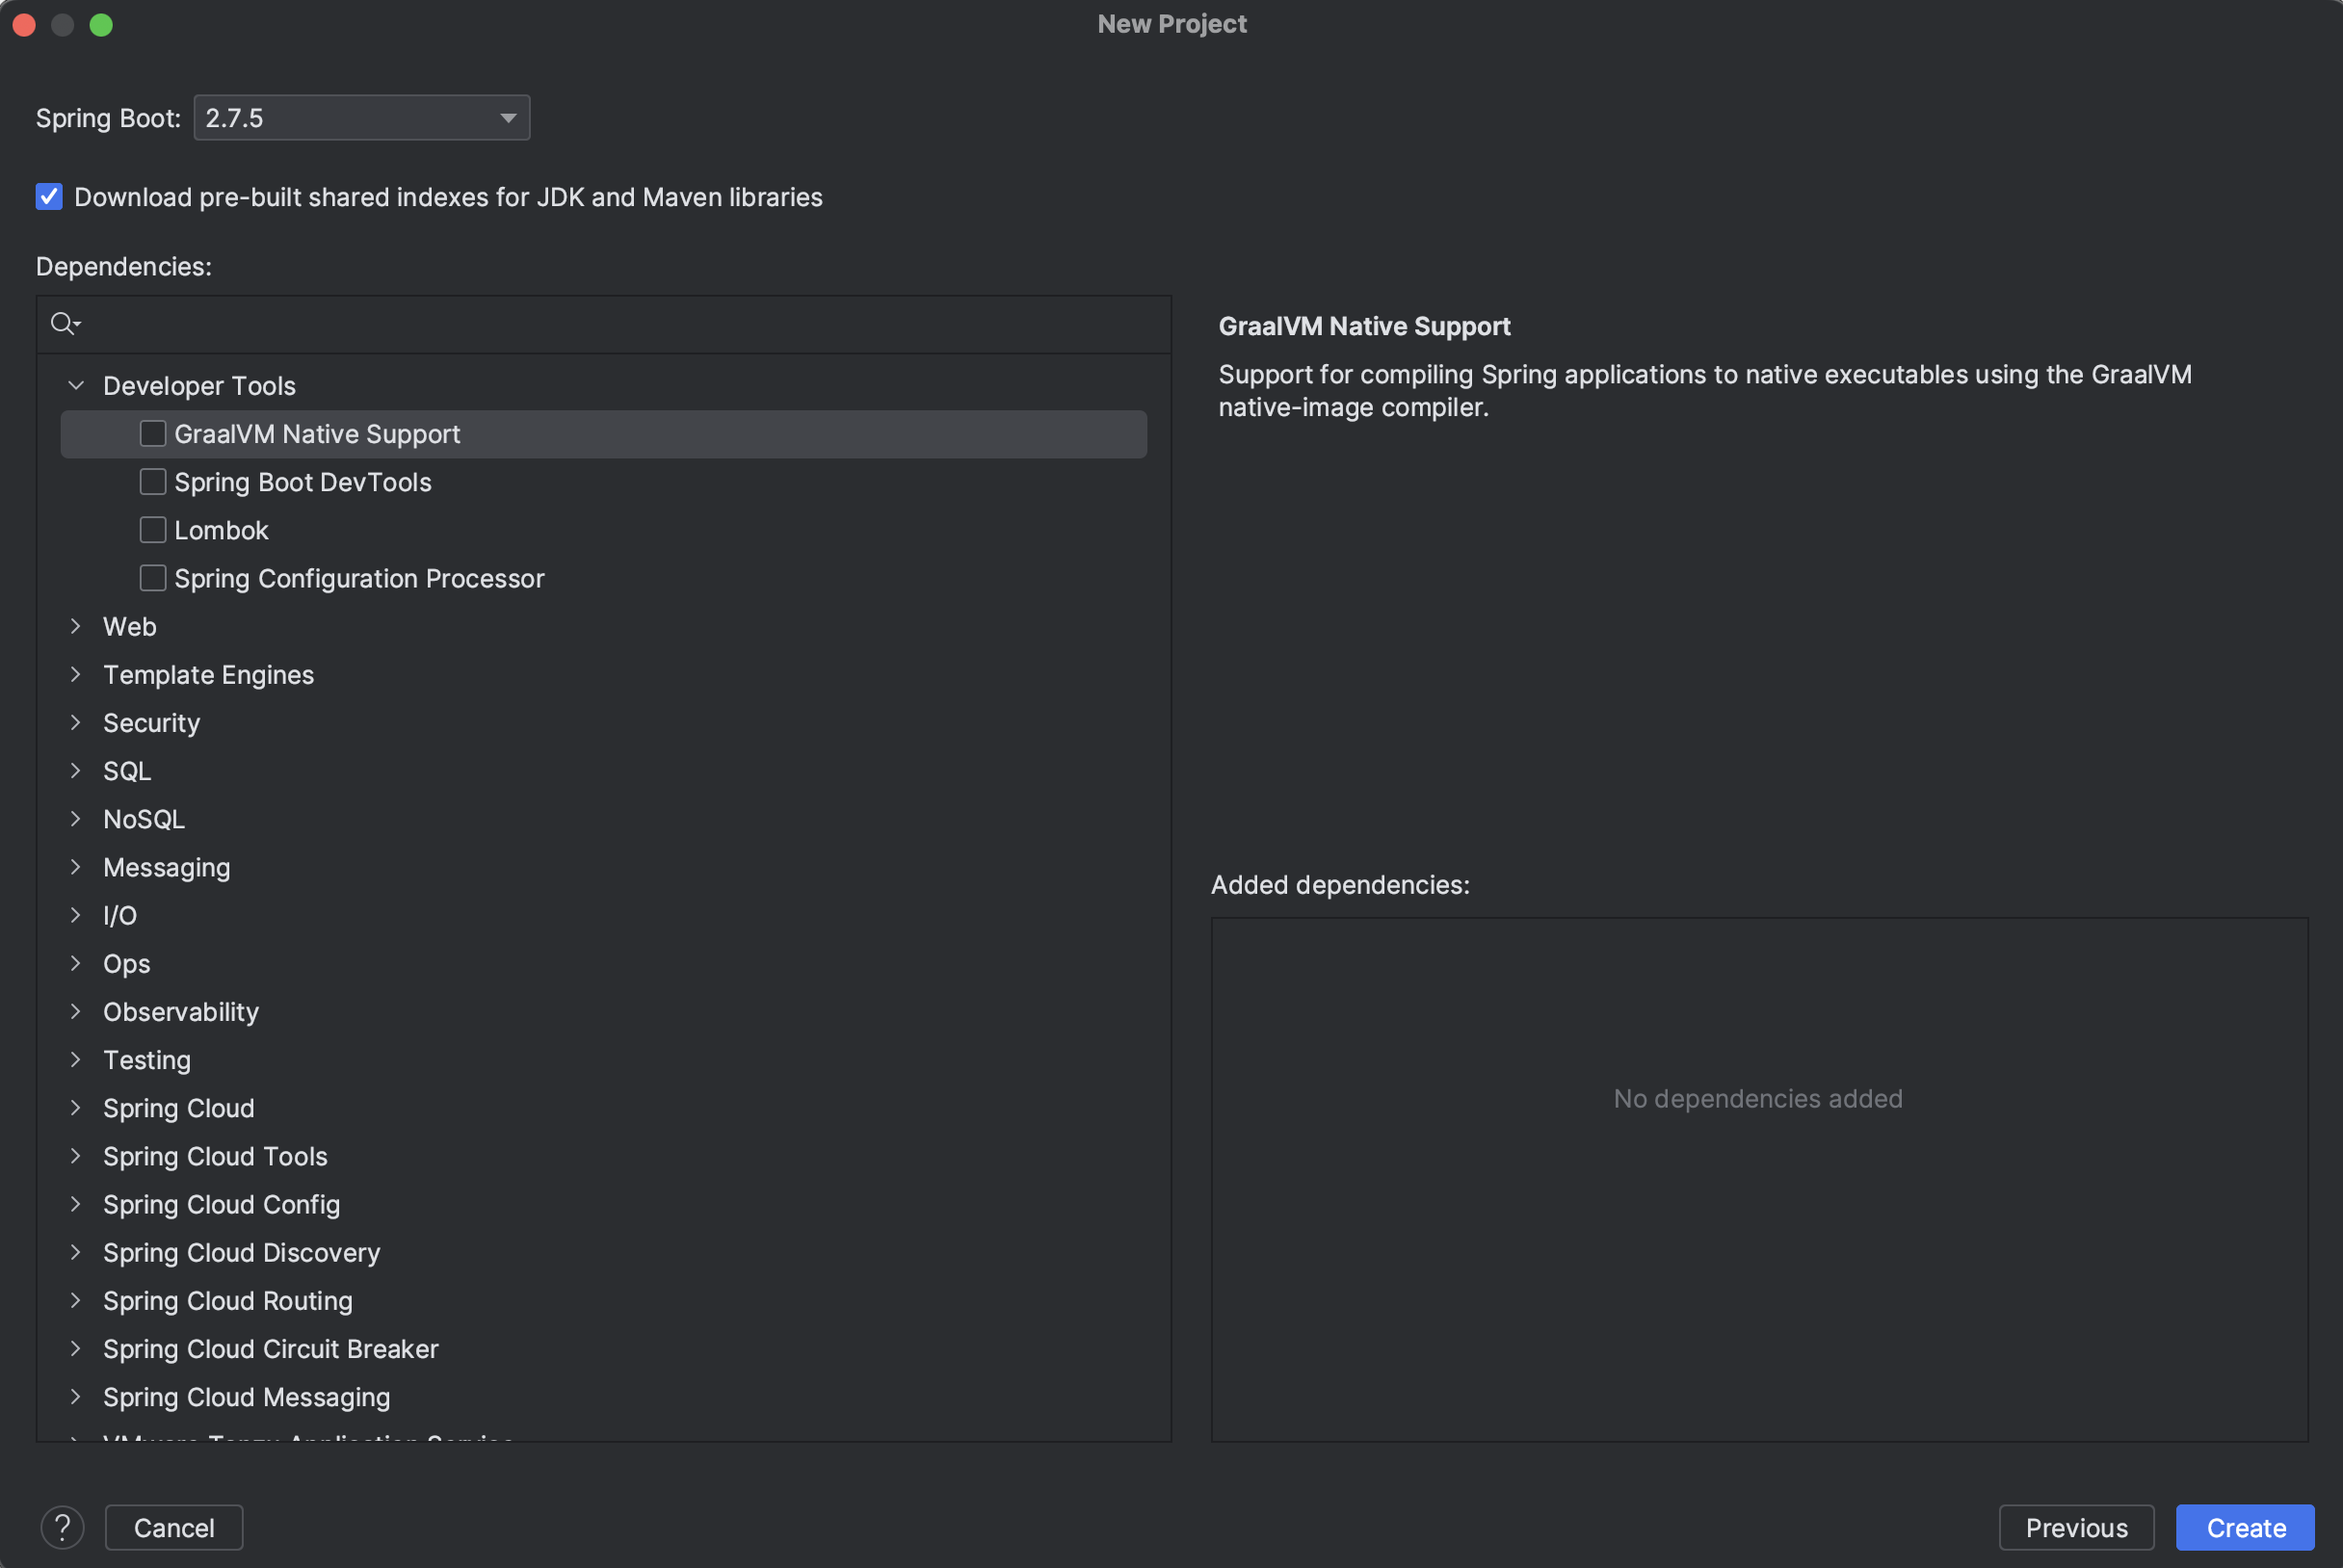
In either of the two methods(Spring Initializr and using IDE), you will see two sections in columns, one is for the project metadata, and the other is for adding dependencies for your Spring boot project.
Adding dependencies can be done later after generating the project as well. But it's easy to add a dependency by choosing from a huge list.
Spring Initializr
Go to https://start.spring.io/, and you will be given a form to fill in the metadata of your spring project.
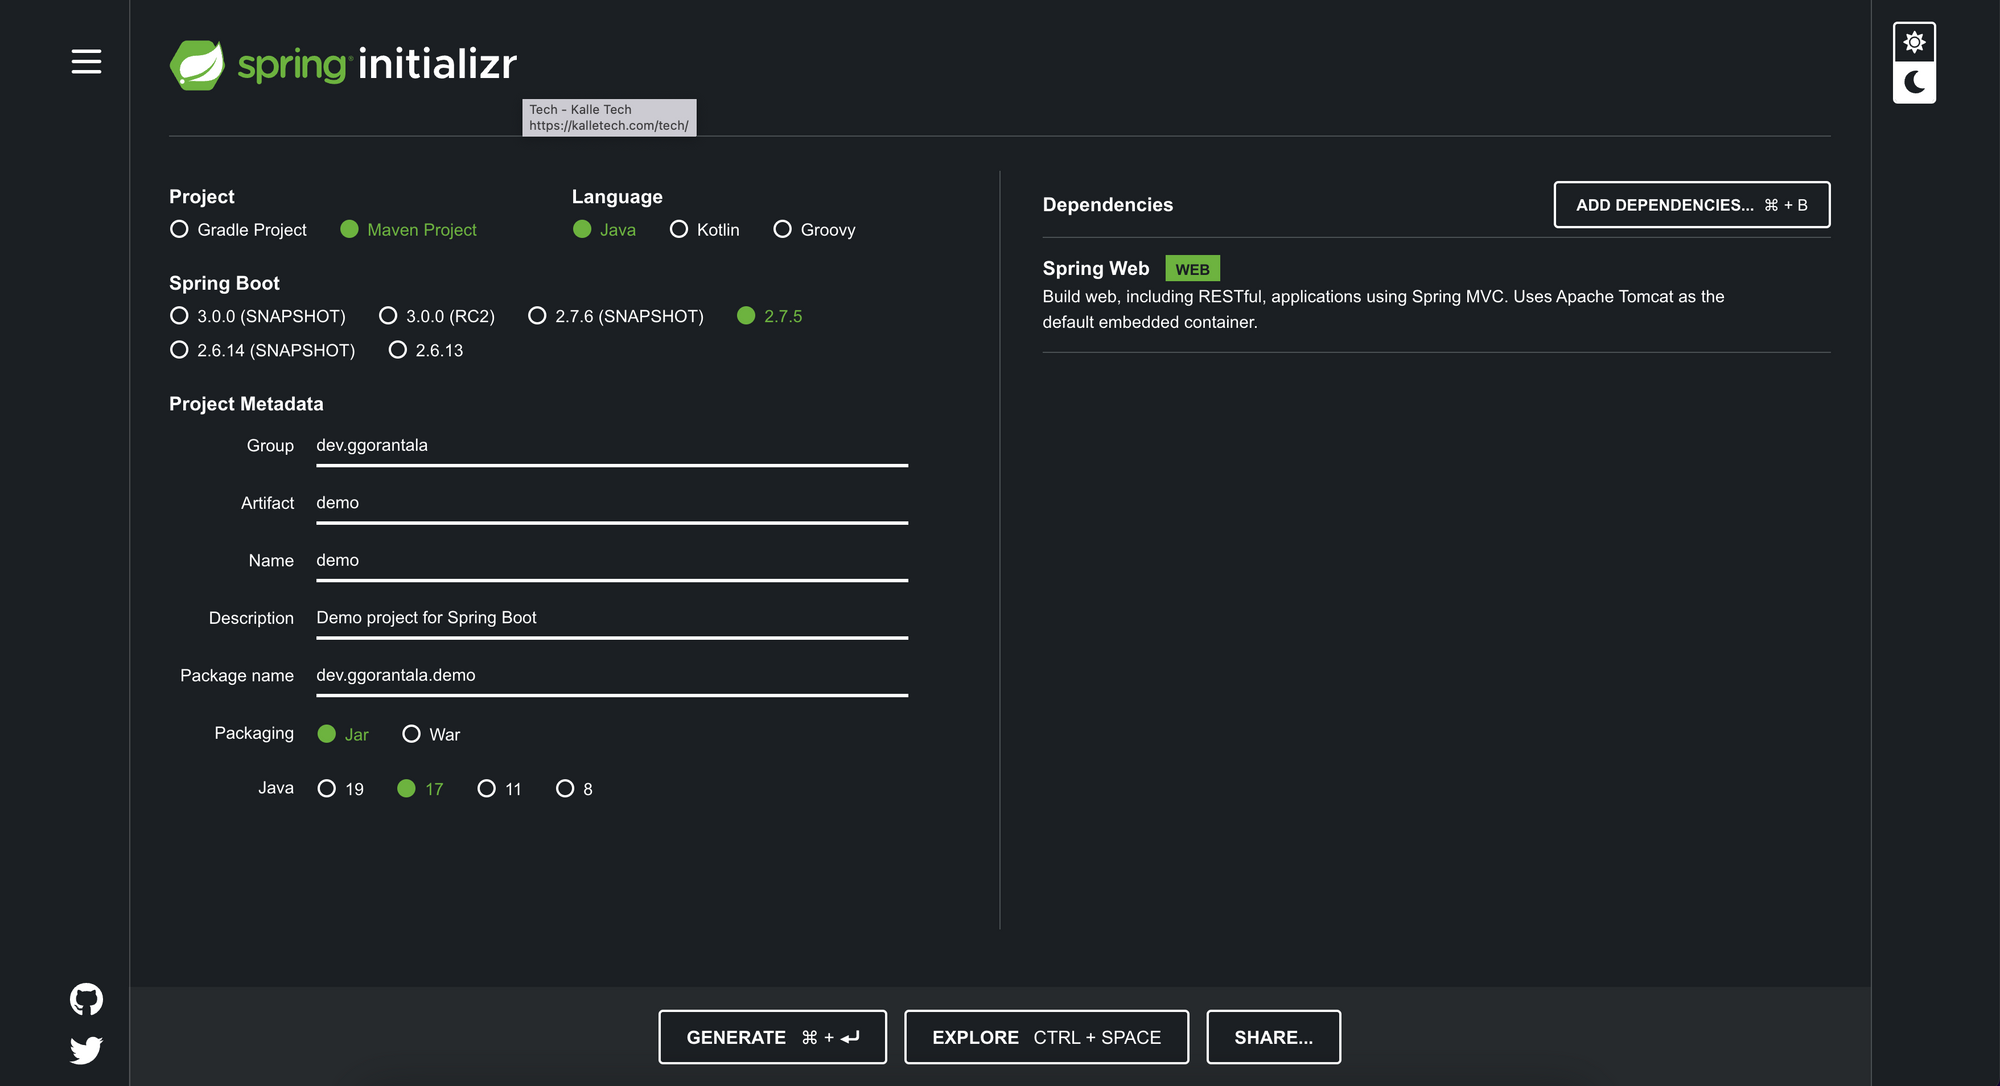
Steps:
- Select the
MavenorGradleproject based on your preferences. - Choose
Javaas your language and SpringBoot version as the latest stable release. - For the project metadata, change the following.
- Group:
dev.ggorantala - Artifact: Lowercase recommended. For simplicity, this is already set to demo.
- Name: Leave it to defaults.
- Description: You can change it or leave it. This is an optional field.
- Package Name: Let it be
jarfor now. - Java Version: Select the java language installed on your machine. Choose the LTS version.
- Group:
- Dependencies: We can add single or multiple dependencies here based on our choice. Let's try to bring up something on the webpage. To do this, we need to add
Spring Webas a dependency.
Spring Web: This dependency helps build web, including RESTful, Spring MVC and, interestingly, the Spring Web dependency has an embedded Tomcat container.
Click on Generate to generate the configured project. Download, unzip, and open it with your IDE (IntelliJ Idea / Eclipse / STS).
Spring Boot Starter Project in IntelliJ Idea
IntelliJ Idea is the number one choice, per the survey conducted by open Java communities and the Java official channel.
For instance, I was asked only to use IntelliJ Idea when I worked for Apple, Jive SBS, a Medical startup, and European Commission companies.
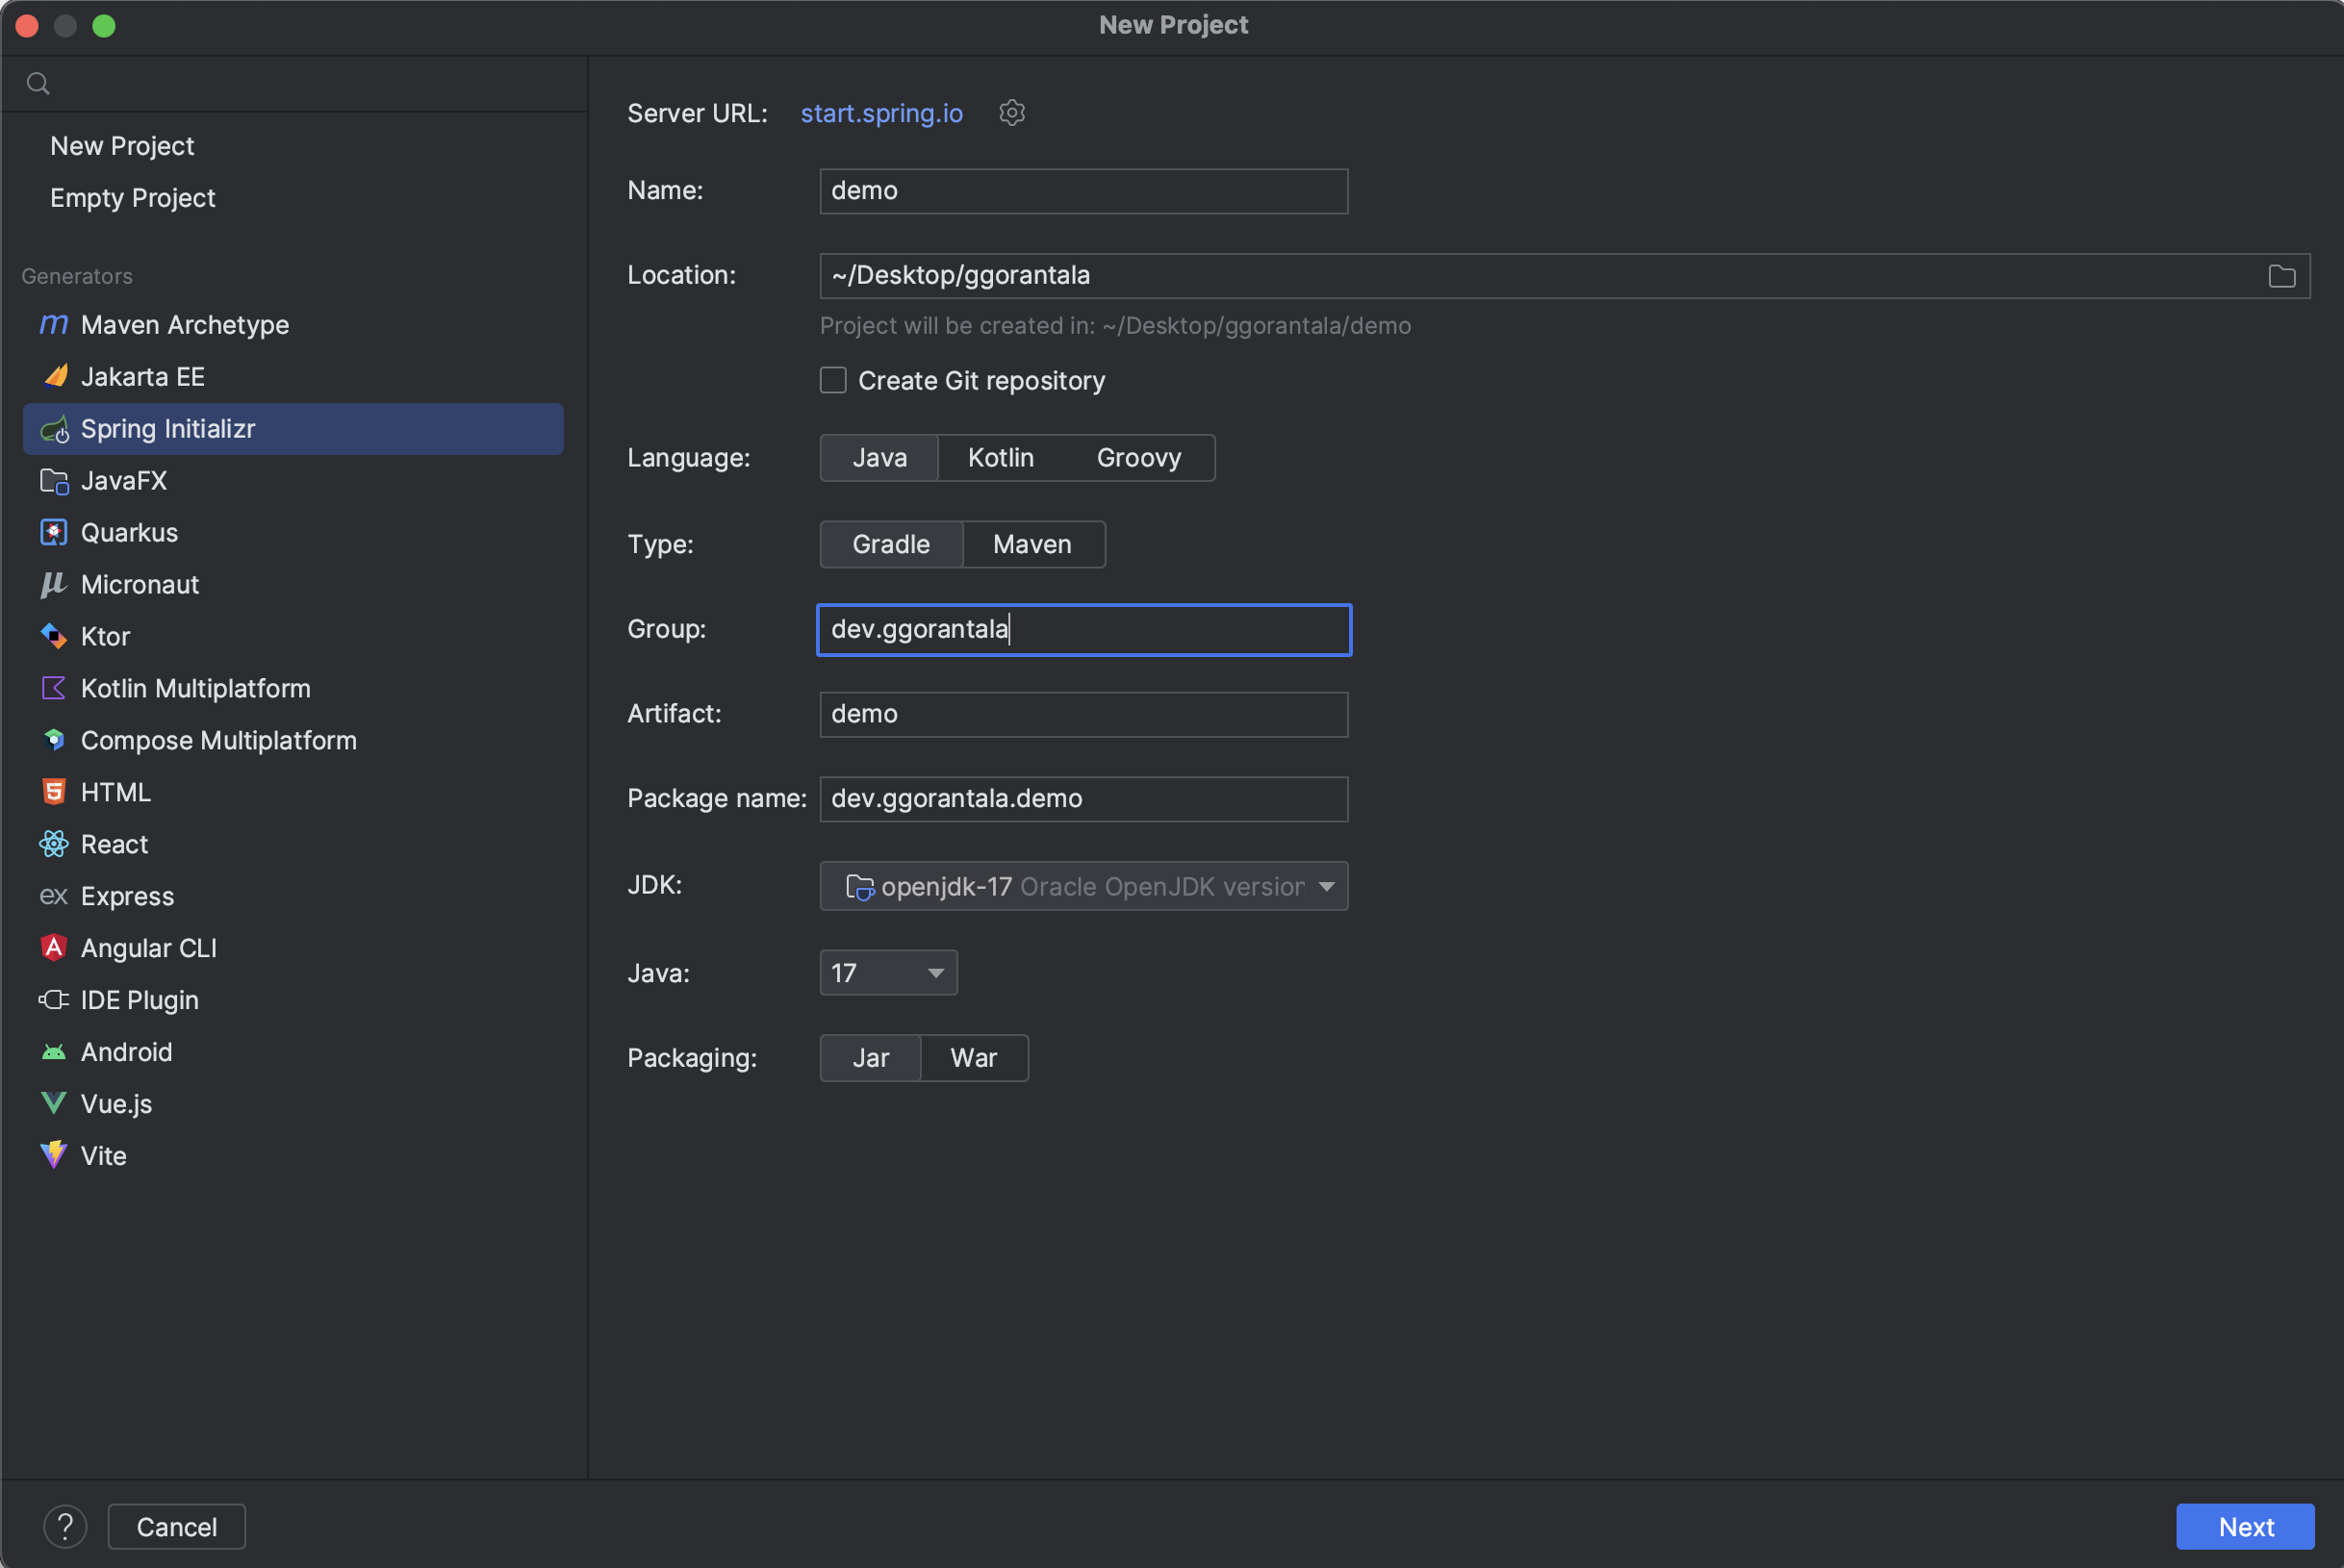
Steps:
- Install IntelliJ Idea. Could you open it and click on New Project?
- For the project metadata, change the following.
- Name: Leave it to defaults.
- Language: Select
Java. - Type: Select
Maven - Group:
dev.ggorantala. You can choose your own. - Artifact: Lowercase recommended. For simplicity, this is already set to demo.
- Description: You can change it or leave it. This is an optional field.
- Package Name: Let it be
jarfor now. - JDK Version: Select the Java language installed on your machine. Choose the LTS version. I use Java 17 to get a load of all the advanced features.
Click next, and you will see the following screen.
We can add single or multiple dependencies here based on our choice. Let's try to bring up something on the webpage. To do this, we need to add Spring Web as a dependency. Search for Spring Web
Spring Web: This dependency helps build web, including RESTful, Spring MVC, and, interestingly, the Spring Web dependency has an embedded Tomcat container.
Spring Boot CLI
- Install the Spring Boot CLI on your system.
- Open a command prompt or terminal.
- Navigate to the directory where you want to create the project.
- Run the following command to create a Spring Boot project:
spring init --name=myproject --dependencies=web,data-jpa myproject
This command creates a project named "myproject" with the specified dependencies. Once the project is created, you can import it into your IDE as a Maven or Gradle project.
CLI with Maven/Gradle
- Open a command prompt or terminal.
- Navigate to the directory where you want to create the project.
- Run the following command to create a new Maven-based Spring Boot project:
mvn archetype:generate -DgroupId=com.example -DartifactId=myproject -DarchetypeArtifactId=maven-archetype-quickstart -DinteractiveMode=false
For a Gradle-based project, use the following command:
gradle init --type pom
Once the project is created, you can import it into your IDE as a Maven or Gradle project.
Fire-up the project
Once either of the above steps to you to download the project. Open with your favorite IDE and start/run the project. We started the project, and a snapshot is copied below.
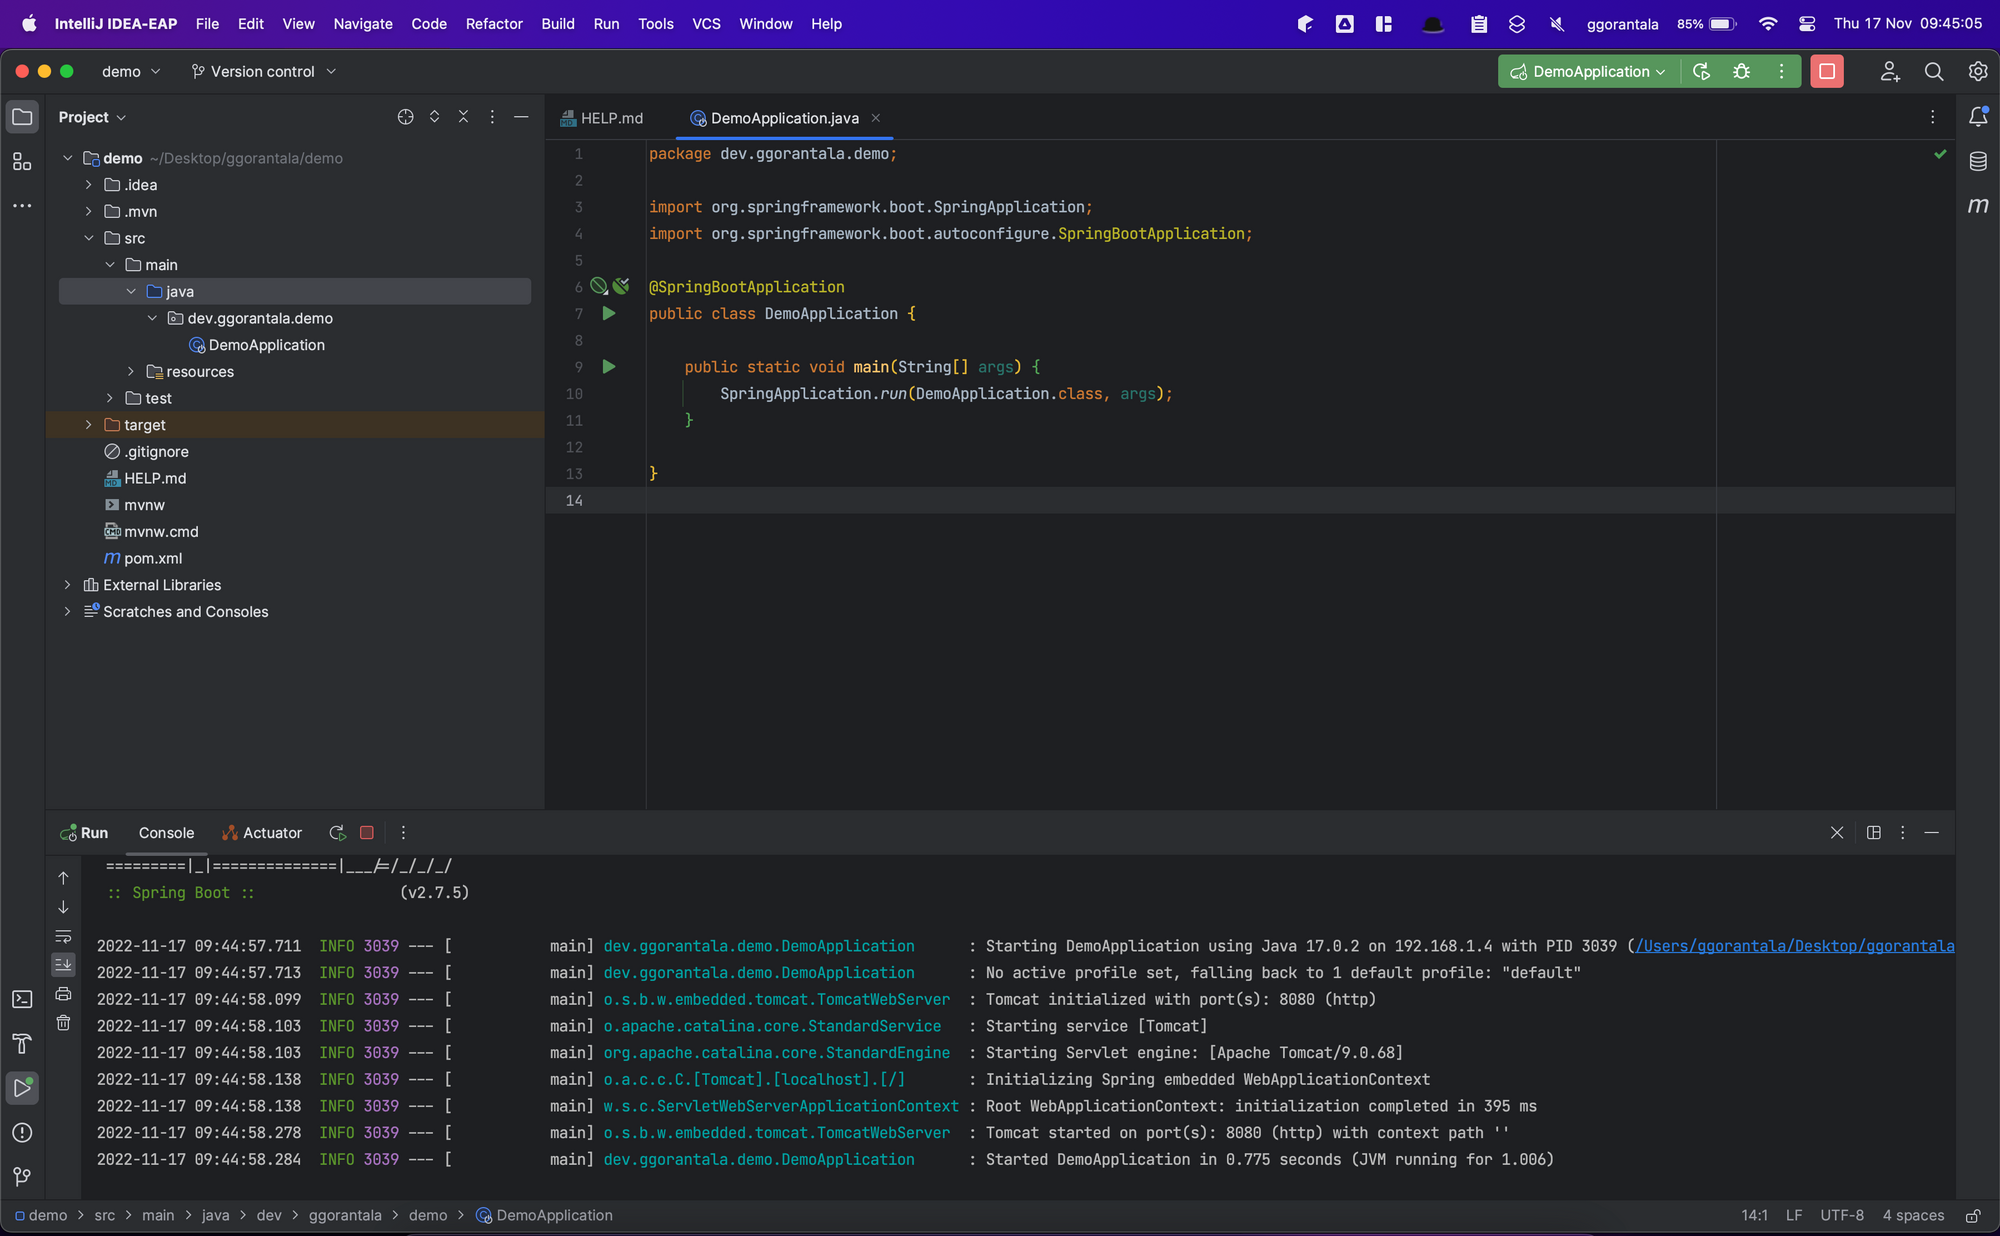
After starting the project, we saw a built Tomcat runs our application.
2022-11-17 09:44:58.103  INFO 3039 --- [main] org.apache.catalina.core.StandardEngine  : Starting Servlet engine: [Apache Tomcat/9.0.68]
2022-11-17 09:44:58.138  INFO 3039 --- [main] o.a.c.c.C.[Tomcat].[localhost].[/]       : Initializing Spring embedded WebApplicationContext
2022-11-17 09:44:58.138  INFO 3039 --- [main] w.s.c.ServletWebServerApplicationContext : Root WebApplicationContext: initialization completed in 395 ms
2022-11-17 09:44:58.278  INFO 3039 --- [main] o.s.b.w.embedded.tomcat.TomcatWebServer  : Tomcat started on port(s): 8080 (http) with context path ''
2022-11-17 09:44:58.284  INFO 3039 --- [main] dev.ggorantala.demo.DemoApplication      : Started DemoApplication in 0.775 seconds (JVM running for 1.006)
Navigate to https://localhost:8080, or the IP address of the localhost is "127.0.0.1".
To access either https://localhost:8080 or https://127.0.0.1:8080 to see your application live locally on your computer.
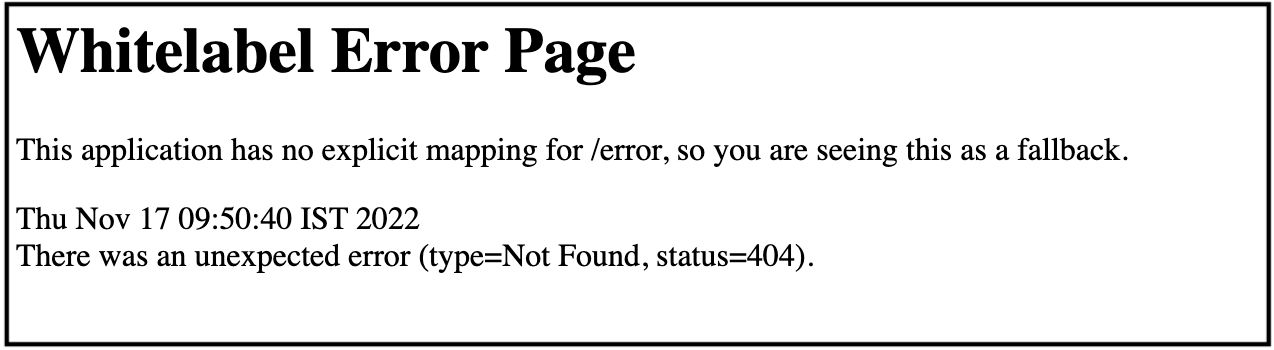
Don't be surprised to see the following error screenshot when you access https://127.0.0.1:8080. If you see the following error, then we are good.
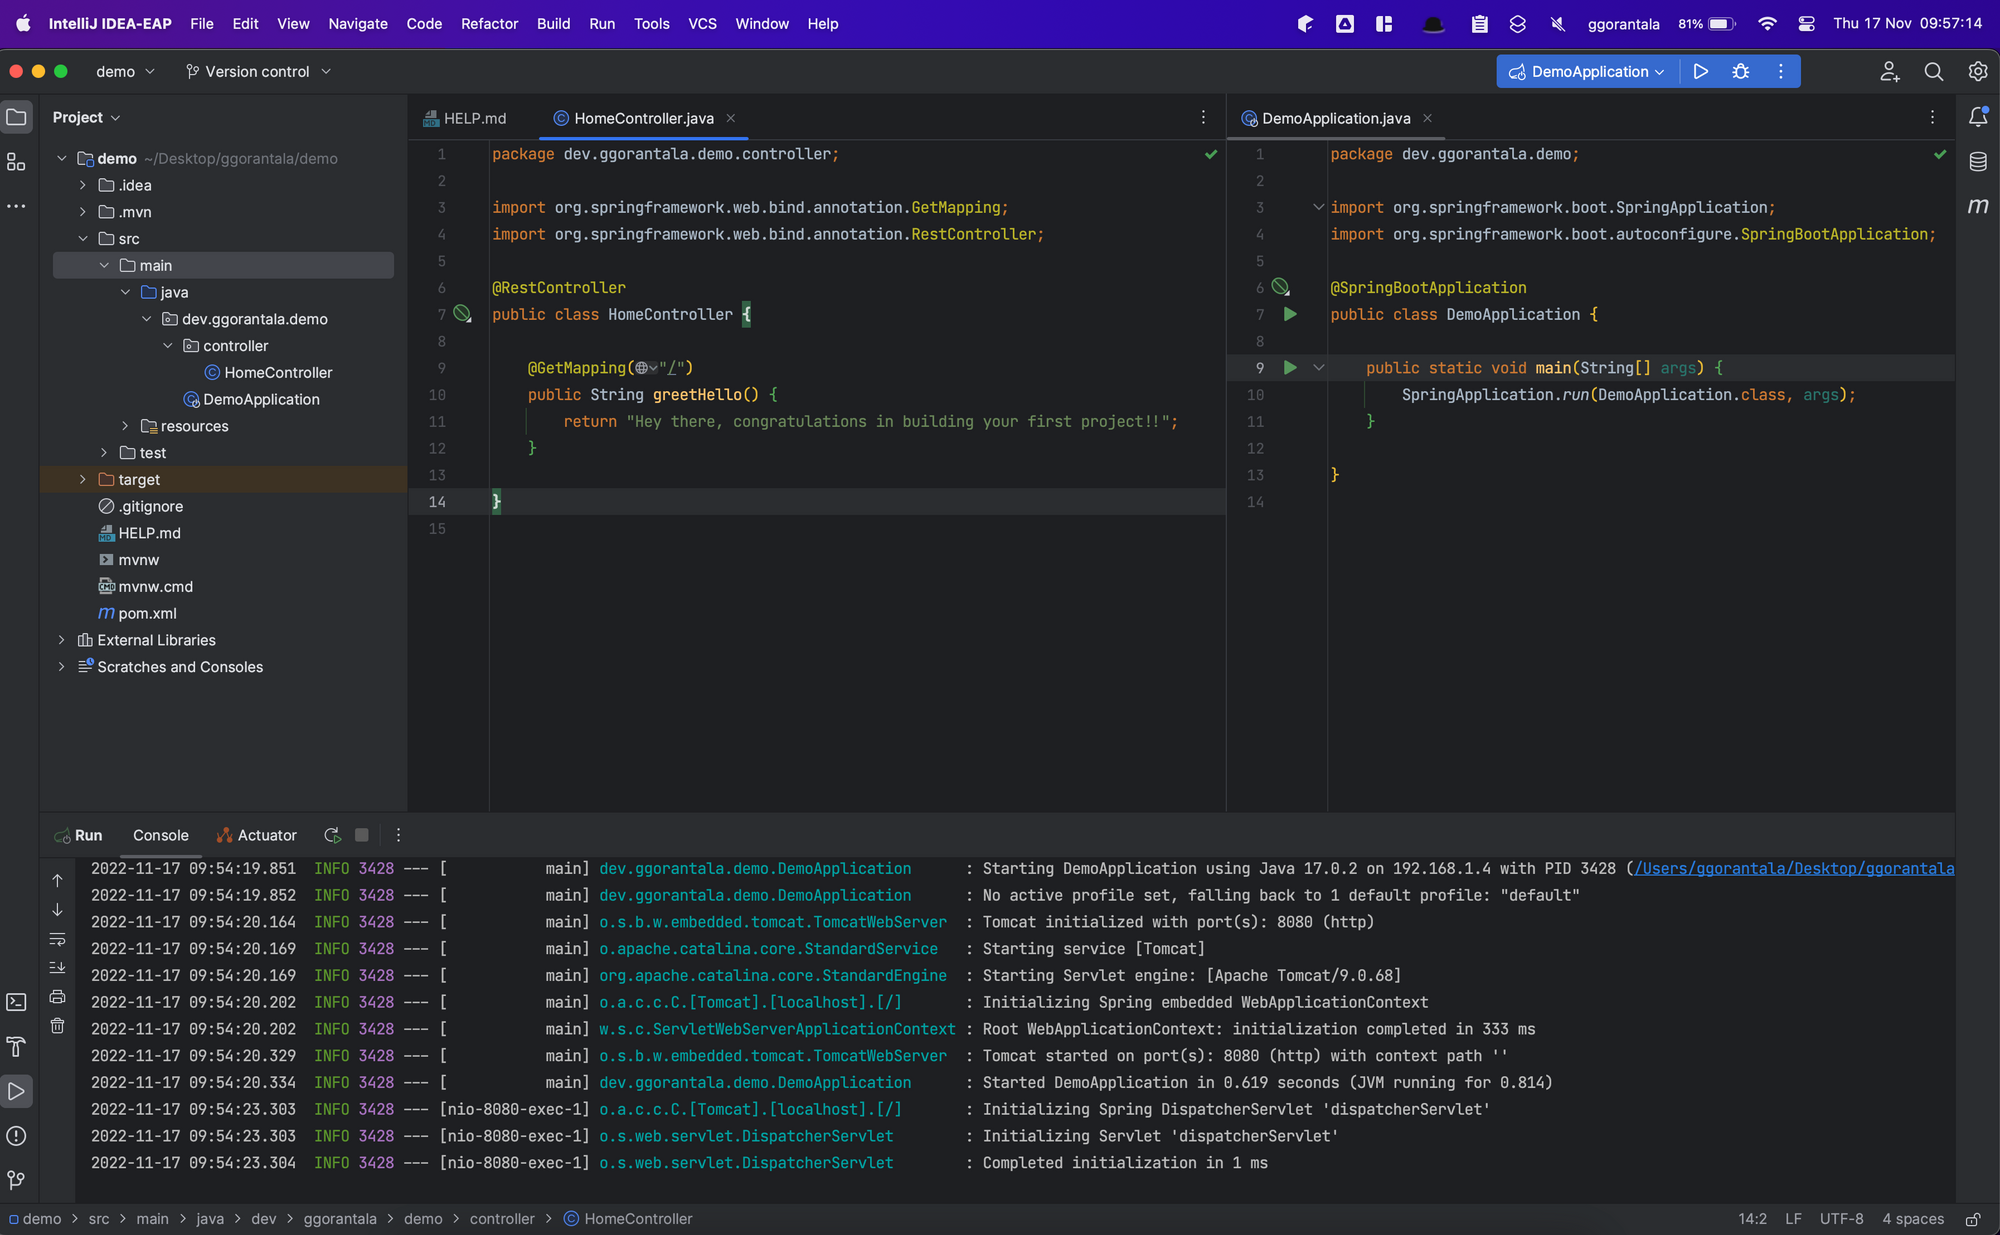
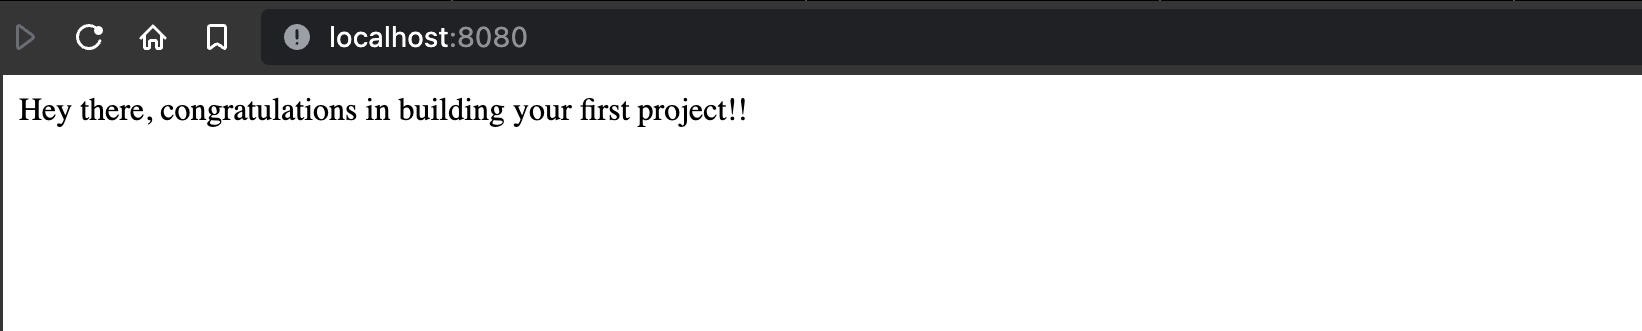
Add the following code to the project we created, and we can see our first greeting message live on the webpage.
package dev.ggorantala.demo.controller;

import org.springframework.web.bind.annotation.GetMapping;
import org.springframework.web.bind.annotation.RestController;

@RestController
public class HomeController {

    @GetMapping("/")
    public String greetHello() {
        return "Hey there, congratulations in building your first project!!";
    }
}
Snapshot:
Isn't this the simplest configuration and bootstrapping an application from scratch?
🤩 Happy Coding!!

Gopi Gorantala Newsletter
Join the newsletter to receive the latest updates in your inbox.